How to Keep a Golf Mat from Sliding? (5 Solutions)
For every golfer looking to improve their game when not on the golf course, an at-home driving range or at-home golf simulator is a great way to get some extra practice time.
This type of home setup is a great way to work on your game and demonstrate a true commitment to lowering your handicap and improving your golf skills.
However, while having a golf practice center at your home sounds great, setting it up can get a bit tricky.
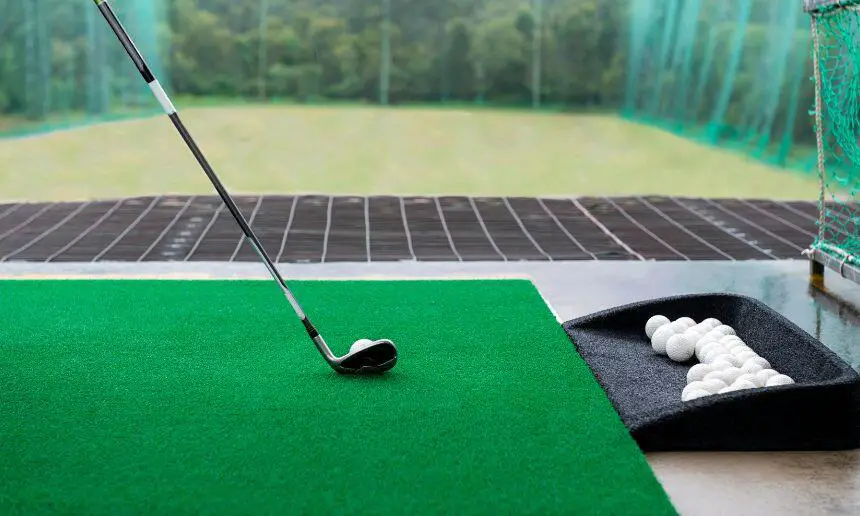
One of the things you may struggle with is securing the golf mat to the ground so it doesn’t slide.
Having the mat underneath you slipping and bunching is extremely annoying, so it’s necessary to get it right.
Below, I’ll share a few tips on how to keep a golf mat from sliding and explain why this issue is so important for your practice.
Table of Contents
How to Keep a Golf Mat from Sliding?
Before purchasing and installing a golf mat, you should consider what kind of mat you’re dealing with and what type of surface you’re going to attach it to.
This will, to a large degree, determine how you’re going to approach the sliding issue and what method you’re going to use to secure the mat to the ground.
Here are some of the ways you can prevent your golf mat from sliding and distracting you while practicing.
Using Non-Slip Rubber
No products found.
If you’re attaching a golf mat to a hard surface, probably the best way to secure it is by using non-slip rubber tapes.
Commonly, these tapes have an adhesive backing that you can easily attach to the mat, while the rubber bottom part of the strip will work to prevent sliding.
For best results and optimal slip resistance, you should attach one strip to each of the mat corners.
Of course, you can also add additional strips for extra slip resistance. This approach will work best for very flat and hard surfaces such as plywood or cement.
The only issue you may run into is that the strip won’t stick to the back of the mat. To deal with this, use epoxy to ensure the strips are properly attached.
Just make sure to work quickly and determine in advance where the strips are going to be, as epoxy sets up rather quickly.
Using Velcro Strips
No products found.
Another great way to secure your golf mat is by using Velcro strips. When setting a golf mat at home, many golfers install it on top of the carpet.
This is, of course, very convenient as you can install the mat even in the living room. Plus, the carpet increases forgiveness on the shots and makes strikes a bit softer.
The two-sided Velcro strips will stick both to the carpet and to the back of the mat, ensuring that everything stays in its place and there’s no moving around or sliding.
In addition, Velcro strips make it simple to remove the golf mat when needed and allow you to easily move it to another spot and install it there.
Using Adhesives
No products found.
If you’re certain about the spot where you’re going to install the golf mat and don’t plan to move it around, then the surest way of securing it to the surface is by using glue or similar adhesive.
Unlike Velcro or non-slip rubber strips, adhesives can also help you even out the surface, especially if you’re installing the mat directly on concrete or similar material.
This method, however, does take some careful planning as once you install the mat and the adhesive is set and dry, it will be fairly difficult to undo the process and move the mat elsewhere.
Another thing to pay attention to is that you should move from one side to another when setting the mat on the floor where you’ve already applied the adhesive.
This helps you achieve a perfectly flat surface and avoid any mat bunching which can ruin your shots.
Securing the Mat to the Plywood
In many cases, the golf mat will be attached to the plywood floor, both indoors and outdoors.
As I explained above, with this type of surface, you can use Velcro or non-slip rubber strips to secure the mat to the floor.
However, there’s another nifty trick that will make the mat slide less on the plywood floor.
You can make holes in each corner of the mat and use them to nail or screw the mat through them to the plywood.
If the mat is installed outdoors, you can use landscaping nails or railroad ties.
This will make the mat very secure and prevent slipping and bunching, but it will also remove some of the flexibility when it comes to moving the mat around.
Leveling the Golf Mat
For the golf mat to fulfill its purpose and provide a perfect setting for the practice, it has to be, not only secured to the ground but also level.
If you’re installing the mat outdoors, you can prepare the surface where you plan to place the mat with packing stone and then cover it with topsoil, which you’re going to even out with a leveler.
When setting up the golf mat indoors, you can use a yoga mat and put it underneath the golf mat.
The yoga mats are usually padded with some sort of memory foam or similar material which will work to absorb some of the floor’s unevenness.
Plus, yoga mats will play some role in preventing the sliding of the golf mat.
Conclusion
Even though setting up an at-home driving range or golf simulator is a fun and exciting project to work on, it will present you with some challenges.
The main one will probably be getting the mat to keep in one place and not slide every time you hit a shot.
Having the golf mat slipping or bunching can be very distracting and you’ll need all the focus when practicing shots.
Luckily, there are a couple of relatively simple and practical solutions to this problem, which you can easily implement to prevent the mat from sliding.
All of the tips mentioned above are proven to work, but you’ll have to use the method appropriate for the surface on which you’re installing the mat.